Hello again lovelies,
Well any regular readers will spot that I have had a bit of a spring clean through the old space, and one of the main things you might notice is that the hats have vanished, along with vintage sewing!!!
 |
| The Mad Hatter |

doll artist and maker of curiosities, here are my thoughts, processes and general chatting
|
| The Mad Hatter |


 You may have notice that there wasn't a post at the end of last week, well mini apologies, but in truth I'm not really sorry, you see the weather here was lovely and I chose to sit outside and so I needed to be able to do something portable, small and visible in the sun. The screen on the laptop would not have been up to the task I'm afraid, so I went with sunshine and not blogging, it's not like this is a job, I am suppose to do it for fun, so what the hell. And I had a lovely time sitting with my head in the shade and my legs up on a chair and in the sun. Although the garden still has no grass and looks like a building site, I pretended and it was lovely. The dog loved it too and insisted on joining me on the chair, although she is not the right size for a lap dog anymore. I tried to get a photo with her looking at me but she insisted on turning round as soon as I clicked.
 And here one of the things I did out there, a mini little veil for the cake topper we will have, told you I wanted to get all the things I could get done as early as possible to make sure there isn't a big rush at the last minute. It has 5 little roses made with bullion stitch. cute heh.
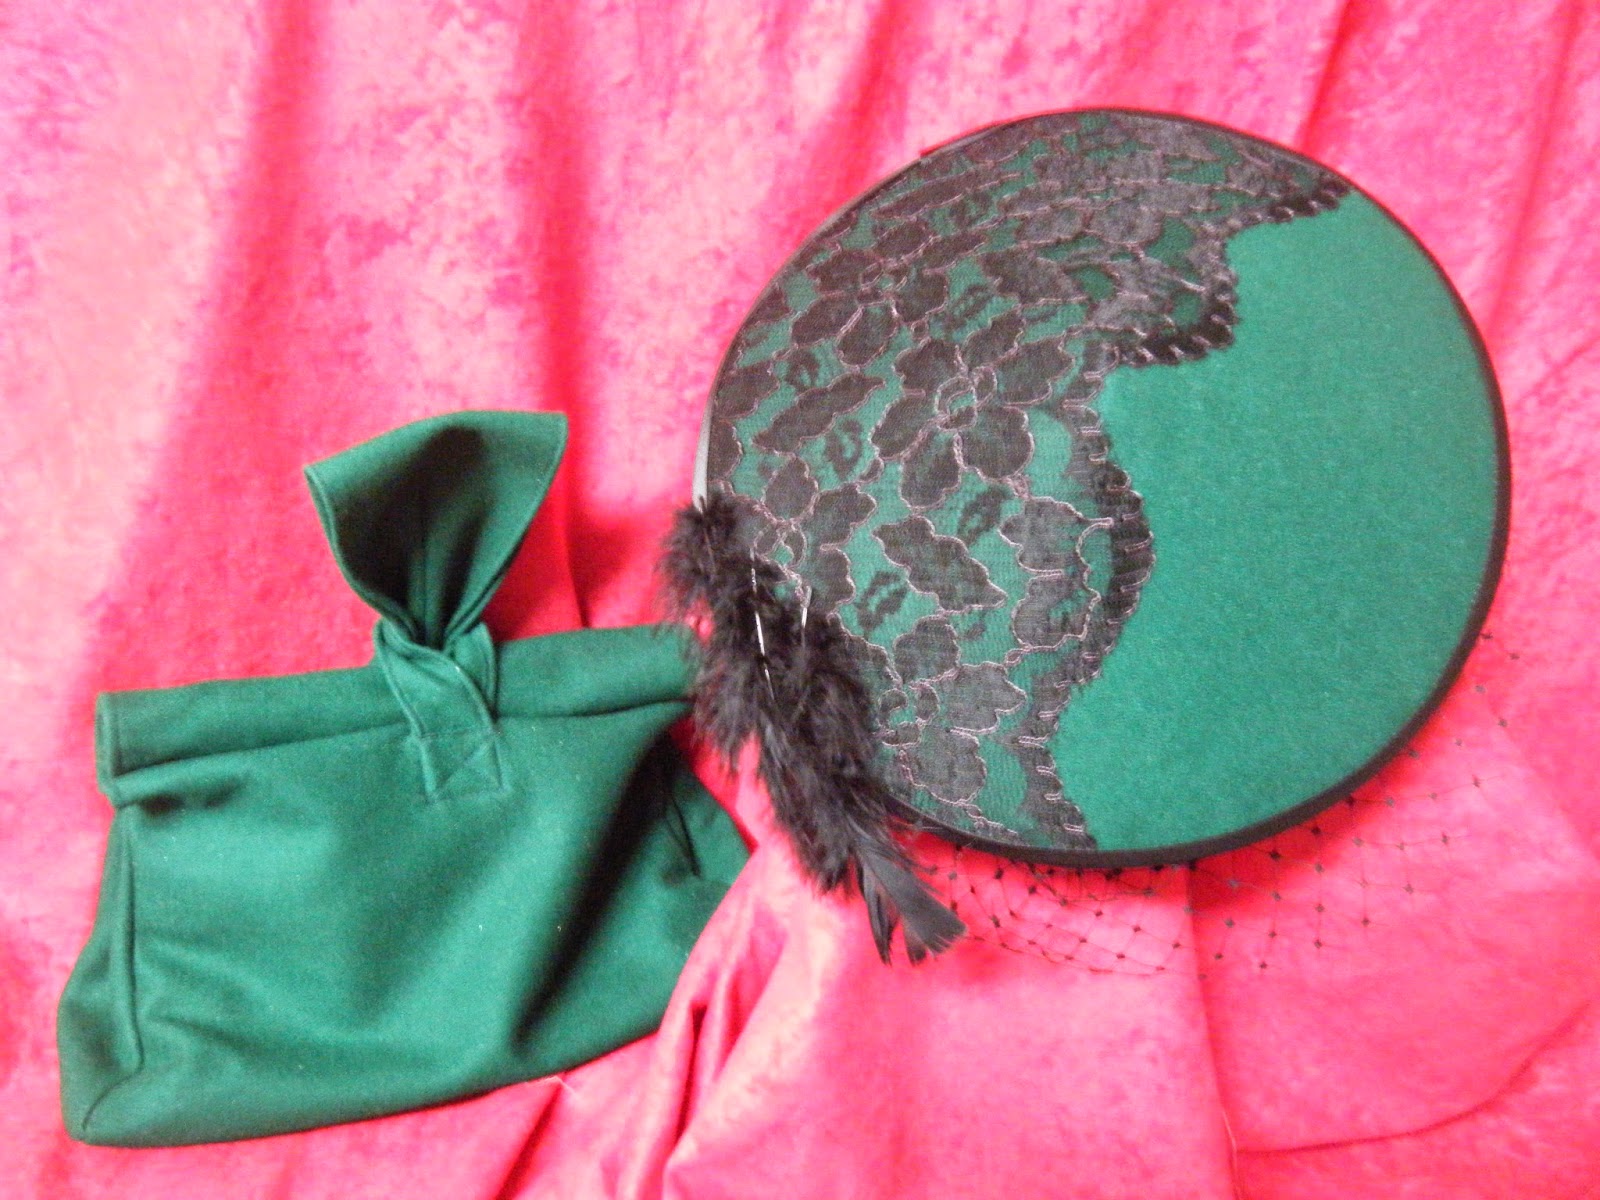
 Well what should I have blogged about last week, it might have been about this lovely little hat that I made to go with my flowery dress for challenge 8 of the HSF, or might might have been some new steampunk creation, or about underwear, which would you have prefered? Well since I can't hear you, we will go with the hat and next time I will tell you all about how the 1910s corset is coming along or more steampunk stuff.


 .
.


 I decided that a bit of fleur de lis would look rather grand and got out an old lump of polymer clay and a fleur de lis rubber mold. Rubber molds are great, most of mine came from when I was decorating cakes more regularly, but are now in the polymer box, and there is no going back. If you do use something with polymer clay it can't be used for food stuff again. Nasty stuff if you eat it or bake it too hot, poisonous either way. So if I wanted to mold icing, the original reason I bought most of these molds, I would have to go and get new ones. This is unlikely though, apart from my own, I can't see me making anyones wedding cake in the near future. So after preparing your clay, push it into the mold


 Because I was planning on decorating a round hat with these I wanted to bake them with a curve to their backs so put them on the outside of a bowl, if you just gently press they should stick down easily.
 Then came painting, I do love blue. Obviously you could just use clay the colour you want, but I was just using up old scrap clay, I used metallic acrylic paint in 'sapphire'
  and just a touch of rub'n buff in antique gold to highlight the edges, the one on the left before rub'n buff and the one on the right is after, so you can see it's just a light touch.
 Then I stuck them round the base of the hat crown and decided not to put them on the opposite end but around the top instead, so those ones could have been flat baked, but still looked ok.
 These lovely little birds started off white too, I think they might be for weddings, but now they can sit pride of place on this hat.
 And as a last touch, a small homage to my favourite book, Alice through the looking glass, a polymer clay clock with a twist, if you look closely you will see that the numbers go the wrong way, and I know the mad hatter was down the rabbit hole in wonderland, but there is a competition running at the moment in a facebook group called the mad hatter's society:


 Hugs and Kisses
 |
| have to say I was quite surprised at all the colour out there |
 Well there they have languished at the bottom of the shoe box for a few years now until looking for inspiration for this project I stumbled open them again and inspired from the brilliant challenges others have been doing in this group, I knew I had my project, make these shoes good again. Just what era now? well looking at them they had a bit of a 30s vibe, and I seem to be wearing more 30s style lately.


 It did start to look like something out of Hellraiser at one point, and I had quite sore fingers as I kept stabbing myself.


 How historically accurate is it? quite good, I'd say a fair 7 /10