Good morning all
I hope you are all feeling tip-top today. Well we have nearly 10 weeks till the big day and I kinda went and did a little silly something; You may remember a few weeks back when I was listing some of the things I had to do for the wedding well.....
There are quite a few already, but when chatting about getting matching ties for the chaps to the bridesmaid's dress and telling Dr J. to take some material with him to match up, it suddenly struck me that the best way to get a match was to use the same material. Doh. Well I now find myself with about 6 neckties to make..... How hard can it be?
Well in truth not all that hard actually. I did a little internet browsing and found a few free templates and blogs about how to sew ties and choose to use one by purl soho, a lovely internet haberdashery who have a blog called 'the Purl Bee' where you can find the pattern and lovely detailed instructions. Link here.
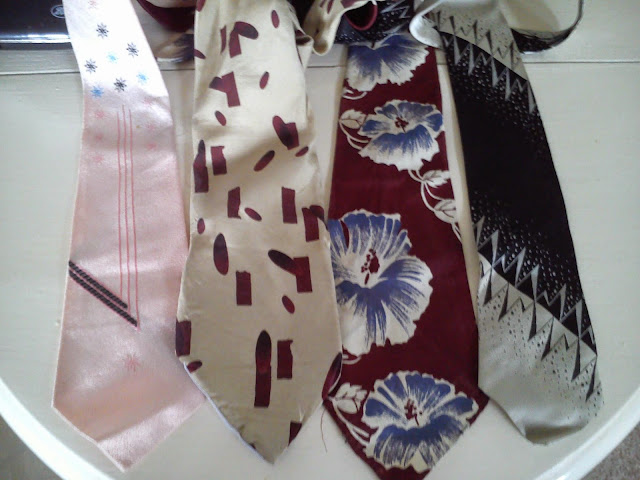
Before you see how I did though, I thought I'd check out some of Dr J's ties. Here are a few of his vintage one.
The first thing that stuck me was only 1 was lined, but I like the lining so I'm sticking with it.
 Also only 1 of the ties, the one with the lining not surprisingly, had anything that felt like interfacing, so the others were very soft. For the wedding I think I would like the ties to be that bit stiffer as it may seem more formal. But it is worth bearing in mind for any future thoughts of tie making, giving it a go without the stiffening/interfacing. I also want to adapt the pattern to make a much wider tie for a more 40s/50s feel, but for my first attempt at making a tie I am quite please and happy to have found the purl bee blog. (Do have to say though in my keenness to get started I didn't read properly and didn't notice that the pattern pieces should be cut on the bias. It doesn't say on the pattern which way the grain should go, so do read the blog properly first. And although I think the end result is ok, it may warp later, who knows.
 Just as a quick note on the learning curve that is sewing; neckties require almost all hand sewing, so at some stage there will be a little bit of thread showing, I don't care how neat you are, there just will be, eg. when slip stitching the lining to the tie ends.
On one end I used thread that matched the blue tie material and one one end I used creamy thread that matched the lining. I think cream won, so note to self use thread to match the lining colour when slip sticking.
Sewing the ladder stitch up the back.
And here it is, my first tie, looking at it now I think a better ironing is in order to get the point at the bottom into the centre, but it's ok.
And just so you know this isn't the material for the real wedding ties, I just wanted to practice and you may as well practice with a nice fabric. So once the bridesmaid dress are cut out I will be attacking the left over to get some ties out of them, hows that for economical.
Well that's all for today, hope you all have a great weekend.
Hugs and Kisses
Ally


No comments:
Post a Comment